Saturday, July 31, 2010

Compost Update

Here is a list of things that you can compost along with your food scraps from the blog Bonzai Aphrodite (she's pretty cool). The purpose of her blog is to express her "the fusion of cutting-edge urban lifestyle and a mindful, positive existence." Perfect. Here is her list:
  1. Soy/rice/almond/etc milk
  2. Coffee grounds
  3. Fireplace ash
  4. Nut shells (not walnut)
  5. Toenail clippings
  6. Dryer Lint
  7. Human Hair
  8. Pet Hair
  9. Dust bunnies
  10. Burlap sacks
  11. Innards of vacuum bag (empty bag into compost)
  12. Toothpicks
  13. Cotton or wool clothes, cut into strips
  14. Domestic bird and bunny droppings
  15. Old potpourri
  16. Sawdust
  17. Dog food
  18. Fish food
  19. Flowers
  20. Seaweed/nori/kelp
  21. Peanut shells
  22. Condoms! (latex only)
  23. Paper towels
  24. Paper napkins
  25. Paper plates (non wax- or plastic- coated)
  26. Trimmings from an electric razor
  27. Tea bags/ looseleaf tea
  28. Q-tips (not plastic ones)
  29. Newspaper
  30. Dead houseplants or their dropped leaves
  31. Avocado pits (just chop first)
  32. Feathers
  33. Tofu/Tempeh
  34. Pickles
  35. Dead bus on the windowsill
  36. Egg shells
  37. Coffee filters
  38. Balloons (latex only)
  39. Popcorn kernels (the ones at the bottom of the bucket)
  40. Aquatic Plants from aquariums
  41. Matches
  42. Old loofas (real, not synthetic)
  43. holiday wreaths
  44. Pencil shavings
  45. Tampon applicators (cardboard, not plastic)
  46. Bamboo skewers
  47. Old herbs and spices
  48. Cooked rice and pasta
  49. Frozen fruits and veggies
  50. Wine corks
  51. Paper muffin/cupcake cups
  52. Cotton balls
  53. Beer and wine!

Just think of all of the landfill space you will save! And this is just the beginning! I am sure there is more, I'll keep you posted ;)

Peace!

Friday, July 30, 2010

Fifteen - Vermicompost!

We finally got our worms! We have been looking into vermicomposting for some time. Now that we are back in Minnesota, we thought this would be the best way to stop throwing any food scraps away (minus meat and dairy of course). Anything the worms do not eat, we put in the outside compost bin. The pound of red wigglers are sitting in our kitchen, hidden in their Worm Factory. We could have built a worm compost bin, but with this (made from 100% recycled plastic) the worms separate themselves from the ready compost, there is a spicket for worm tea, and it looks nice enough to keep out in our kitchen. Here's an example of a DIY bin.


Feeding worms is a bit like feeding a baby--we need to keep our food scraps small, and they don't like citrus, onions, or spicy food (I don't like the last two, so we are quite compatible). The worms are amazing! They will eat toilet paper tubes, newspaper, cardboard, pizza boxes, eggshells, tea bags, hiar, even burlap! Here is a great website for getting started.

Look at the post below for our video.

Peace!

Wormies!


wormies!
Originally uploaded by Laura & Guthrie
Here is the video of us giving our 1000 new babies a home.

Saturday, July 24, 2010

Compact Fluorescent Lights

After patenting a high pressure vapor light in 1927, Friedrich Meyer, Hans J. Spanner and Edmund Germer applied to create the first commercial fluorescent bulb in the early 1930s. This application was soon purchased by GE for $180,000, who commercialized the first fluorescent light in 1938 (US patent 2182732).


In 1976, a GE engineer by the name of Edward E. Hammer created the first compact fluorescent light (CFL) as a response to the oil crisis. The commercialization of the product was stalled due to exorbitant facility costs for production as well as manufacturing issues with design of the interior coating of the spiral glass. Not until 1995 did the first CFL manufactured in China become available to the public. Sales of the CFL have increased every year since its inception, but still remain more costly than their ignorant cousin, the incandescent light (IL). This has to do with the electronic ballast.

The electronic ballast varies depending on the starting power of the CFL. The three common ballasts are instant start, rapid start and programmed start. The latter is best used in business settings as it lasts longer during frequent power cycling, the rapid start is used best in settings with dimmer switches (IMPORTANT since using a regular CFL in this setting will diminish its longevity) and the instant start is used best in settings where lights are not turned on or off often. For your edification, LEDs are another highly efficient alternative to incandescent lights.

CFLs use up to a 75% less energy and last up to 10 times as long as the IL. So, the initial savings from an IL doesn’t last long (much like the IL itself). Over the life of a CFL compared to that of an IL, you will save, depending on the varying cost of electricity per kWh, anywhere from $30-$45 a light.

According to the same site, if everyone used CFLs, we could save over $700 million in energy costs, retire 90 power plants and stop a half-ton of CO2 from being released into the atmosphere.

It’s important to know that CFLs contain 5 milligrams of mercury in each CFL, regardless of shape, size or color. This amount is miniscule compared to the average 25 milligrams in a watch battery or the 500 milligrams in an amalgam dental filling. Nonetheless, this can pose a hazard to you or your pets if they break open and any of the insides are ingested. (See EPAs website on how to clean up broken CFL(s)) There are now new low-mercury CFL models such as the Alto and the Neolite which have 1 milligram of mercury.

Because of the mercury content and to be eco-friendly, CFL recycling is important. Do not throw them in the garbage! Menards and Home Depot have CFL recycling programs at all of their Minnesota stores. Also, here is a list of Minnesota household hazardous waste collection programsas well as county contact info.

Friday, July 23, 2010

Fourteen - Recycling Cards

We all get cards -- birthday, wedding, get well, congratulatory, etc. After our wedding, I saved all our cards because I felt like it was such a waste to dispose of them. I use to be a person that saved just about every card I was given, but this isn't very practical either.

So, if you get a wedding card, birthday card, shower card, etc in the near future from Guthrie or myself, if it seems a little DIY, it is, and know that the money we saved (sometimes around $5 for the eco, recycled paper, give money to women in Africa, etc cards) will now go into to getting you a better gift! :)

I try to send electronic birthday cards, though sadly, they are not as in vogue and seem like the easy way out or actually sending someone a card. I think they can be more fun to personalize and sometimes take even more time. Plus, who doesn't like an interactive card? You can look a it a few times, but once your birthday has come and gone, you usually just throw away the card anyway, right? Deleting the email is a lot more eco. Here is some info from RecycleWorks.org on holiday cards alone:

- 2.65 billion Christmas cards are sold each year in the US -- enough to fill a football field 10 stories high!
- if we each sent one less card, we'd save 50,000 cubic yards of paper

So, the next time you need a card, think about going electronic or recycling some materials you already have. That's what we are going to do!

Peace!

Saturday, July 17, 2010

Thirteen - Backyard Compost

Now that Guthrie & I have practically our own backyard, we've decided to start composting. We had a mix up with the worms, and with our vermicompost delayed, we needed to do something to start turning our food scraps into food for our plants.

There are many ways to make a backyard compost bin. They can been fancy and bought from the store or they can simply be made of chicken wire. At the school I worked at last year, I helped some students make a bin out of pallets that were tossed out at a hardware store. Here is the link to the directions for the one we built in the ATL. It worked great, though a little big for a shared backyard. Instead, we went with a rubbermaid container that was about 10 years old and was no longer needed at Guthrie's parents' house.

As you see, I started to drill many (MANY!) holes in it for air flow and for drainage (your compost will stink if you don't!).

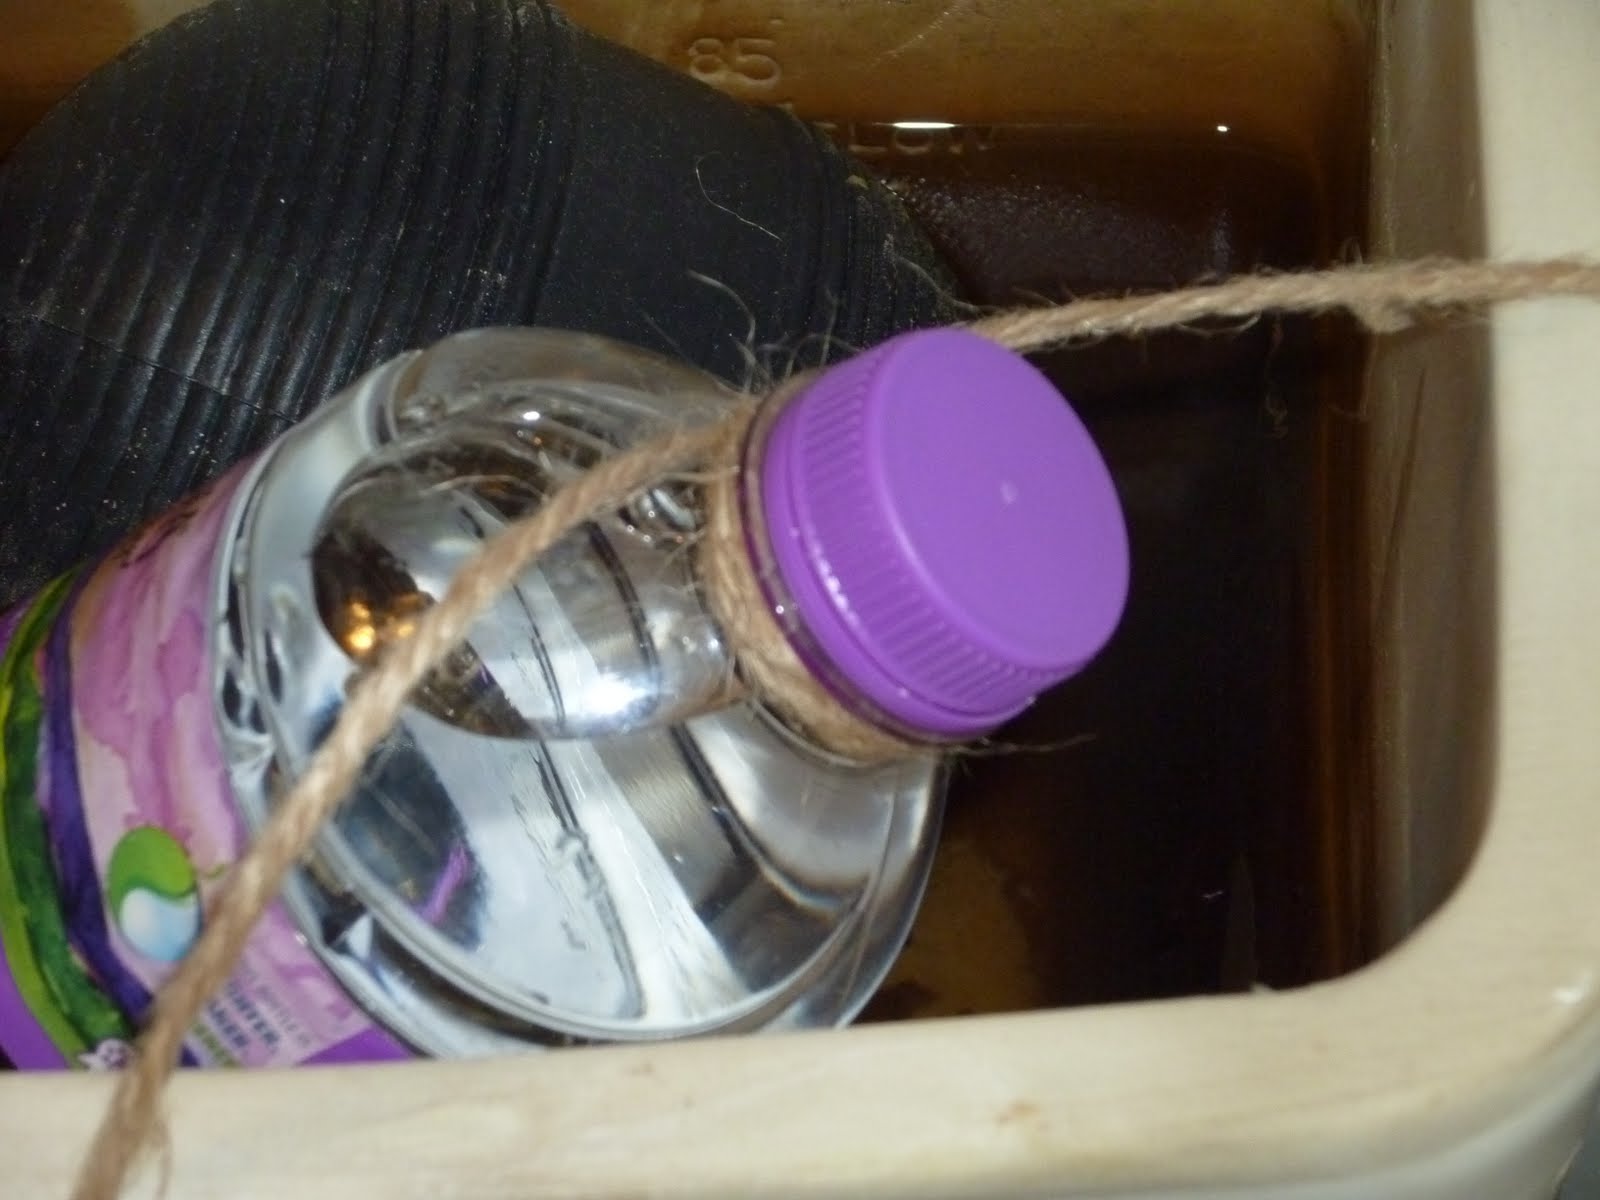
During the week, we throw our food scraps in out handy bamboo counter compost bin which you can buy at many kitchen and home stores. We got ours as a wedding gift from Twin Cities Green (now Moss Envy). On their website, I don't see the bamboo version, but the cute ceramic one. Just make sure you buy some extra filters to go along with it. We only empty the container once per week, so extra scraps that don't go into the bin outside (or with the worms, that will come soon!) will sadly have to be thrown away, though we are really trying to cut back on waste. The size of the kitchen counter bin keeps us from adding too much to the bins as they really need to be balanced to be effective (and not stinky!).


There is almost too much information about composting here. Hennepin County also provides composting 
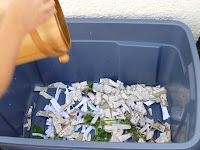
tips.  There is information all over the internet. The main thing is to get the right combination of green (grass clippings, food scraps, etc) and brown (dead leaves, twigs, paper, cardboard, etc). It is important to turn it and also it should be hot! You can see we started with paper (we add grass clippings, and more paper on top of the food waste) and then mixed it all up. We made sure we set the bin on top of some rocks so the excess moisture could drip out of the bottom. Hopefully all goes well!

According to the EPA:

  •      Over eight percent of the waste that each person generates each day could be recovered for composting. That works out to over 140 pounds per person, per year.
  •      Yard waste and trimmings account for nearly 13% of municipal solid waste in the United States. This waste consists of grass, leaves, tree, and brush trimmings - adding up to approximately 33 million tons each year. 
  •      Approximately 12% of the municipal solid waste in the United States is food scraps. While it may seem like a small percentage, it equals nearly 32 million tons per year. 

Before you decide to cut back on your waste and start composting, check your city laws. In Minneapolis, for example, all compost must be confined for some sort of bin (this could simply be chicken wire) and cannot be within five feet of a property line or within two feet of the alley. As you see in the picture above, Guthrie and I need to move our box over a couple of feet to the left, oops!


Peace!

Sunday, July 11, 2010

Twelve - DIY Bulletin Board

My desk was getting cluttered and I needed a bulletin board for the office. Though pretty cheap and easy, I didn't want to go buy a new one. It seemed like something I could make myself. With a little help from Google, I saw it -- a Scrabble bulletin board! I got started right away. I ran a bag of donations to the Salvation Army and stopped in to look at their board games. Any game will do, and this is a great project for those board games with missing pieces.


Supplies:
- 1 game board
- any pieces associated with it (Scrabble tiles, Monopoly houses, etc)
- gorilla glue, something equally as strong
- corrugated cardboard (we used the box our Worm Condo came in, post to come!)
- push pins (or thumb tacks)
- super glue


1. Cut out a piece of cardboard a little bit smaller than the size of the game board.

2. Following the gorilla glue instructions carefully, glue cardboard to game board.

3. While waiting for the glue to set, glue game pieces to thumb tacks/push pins. You may have to sand the pieces down first to aid in sticking. I used push pins because I believe the pieces would stay on better if you could push and pull from the pin, not the game piece, though the thumb tacks look a little nicer.

4. Once the board is set (1-2 hours), nail the wall and start hanging!

The down side to this project, once a hole is in place, it's there forever, unlike cork board. Just reuse the holes or recycle a new board once this one becomes swiss cheese!

Peace!

Friday, July 9, 2010

Eleven - Turn Down Your Hot Water Heater


Easy! Saves energy! Saves the environment! Saves money! Saves possible burns! According to the EPA, turning down the thermostat to 120F will save 6-10% of energy costs and slows the mineral buildup and corrosion in your water heater and pipes. Most manufacturers set the thermostat at around 140 degrees, but it is not necessary for the average family. Turn the knob to 120 degrees (low - medium in our case).

Also, turning down your hot water heater could save you (and more importantly, small children) from terrible burns. The water label on our heater downstairs has time/temperature ratios listed for third degree burns:

1 second at 160F
5 seconds at 140F (and to think that's where most of our hot water heaters are at!)
30 seconds at 130F
5 minutes at 120F


Peace!

Thursday, July 8, 2010

Garden Update!

Here are some pictures of the garden as well as the avocado plant. Remember how small that was? It's a shoot! We have pinched out the top leaves in hopes that will was start to grow out and not so tall! Also, we have some little bitty tomatoes!


Peace!

Tuesday, July 6, 2010

Ten - Upcycling the Un-recyclable

Guthrie & I love to recycle! We are very proud of our recycling center, though we are always sad when something that we buy often cannot be recycled. Here are two things we have found another use for.

1. Milk Cartons
I got the great idea from answers people posted to the question on Re-Nest. First, rinse out completely and then fill with water. Put one or a couple in the freezer and use them as ice blocks in a cooler instead of buying ice from the gas station. Plus, if you rinse them out completely, you can use them as drinking water on road trips or at picnics when the water melts!

We also started using glass milk containers from the co-ops. You pay a bottle deposit, but you essentially pay it once because each time you return it, you get it back (though we usually buy milk every week). The down side is that the milk doesn't stay fresh as long since light can get it and it only comes in half gallon sizes. We will actually use one of the cartons to freeze half of the milk at a time. Usually what we need, when we need, and again, reusing the pesky carton containing. Just make sure you don't fill them all of the way or they will explode in the freezer! When the milk defrosts, give it a shake, and make sure you drink it in a couple of days.

Then we return the glass bottle, get a new, reuse the carton, etc, etc. :-)

2. Yogurt Containers
(or in this case, a cottage cheese container)

Planters! These things are hard to recycle, though Stoneyfield Farms is doing great work. I wanted to get some baby spider plants going from our larger one we just acquired thanks to Guthrie's aunt. Poke holes, fill with soil, and plant! We made a mix of dirt from the backyard and worm castings.

Or you just fill up the container (in this case, a jelly jar, on the right) with water, and watch it sprout roots. We'll update you on how they go!


Peace!

Monday, July 5, 2010

Check Your Carbon Footprint!

Though it is just a general estimate, it takes just a couple of minutes and is interesting to see. Check out the Carbon Calculator on the left hand side at http://www.nature.org/

Friday, July 2, 2010

Nine - Water Conservation

Now that the summer heat is upon us, I think it is the most important time to talk about water conservation. There are some things Guthrie & I are trying to get into the habit of doing to cut back on our water consumption. We all know to turn off the water when brushing our teeth or when shaving, but there are some other things that we don't always thing about. 

When replacing the water for your pet, or getting rid of the last few sips from your cup on your night stand, don't just dump it down the drain. Pour into a houseplant or into a watering can (we have extra's now) to be used to water plants later.

Make sure to always have a full load before starting your dishwasher or laundry. Now with newer washers, you can choose the size of your load; pick the appropriate water level for the load you have. When washing dishes by hand, which we must do now, make sure the water stream is no wider than your thumb (and if you have big thumbs, judge appropriately). If you are scrubbing, turn off the tap. 

Water your yard or garden in the early morning or in the evening. If you water in the hot day-time sun, most of it evaporates before the plants really drink it. 

Here are some water facts from the EPA:

- An average family of four uses 400 gallons of water everyday day!
- Less than 1% of all the water on Earth can be used by people (the rest is salt water or frozen)
- Taking a shower uses much less water than filling a bathtub. A typical shower uses 10-25 gallons and a bath uses up to 70 gallons. 

Tip: If you take a bath (which I LOVE to do once in a while), plug the drain right away and adjust the temp as you go. When showering, time it -- 5 minutes or less. Or, double up with your loved one to conserve water. :)
Here's a link to shower timers on Amazon. Guthrie & I use to have one--I don't actually know what happened to it? I think I dropped it and broke it. But, after using it for a while, I got use to how fast 5 minutes goes by!

Car/bike washing tips - try not to use a hose. Most people just let it run. Make sure you have a bucket to and turn off the hose in between sprayings. Better yet, many car washes are recycling water now. Check with your local car wash to see if they do. 

A leaky toilet could waste about 200 gallons of water everyday! Here's a cool tip to test if your toilet is leaking (again from the EPA website): Put a drop of food coloring in the toilet tank. If the color shows up in the bowl without flushing, you have a leak!


Finally, he's a tip for conserving water with every flush. If you have a home, hopefully you already have a low-flush toilet. Or better still, a dual-flush toilet. Something I am interested in, though I do not know enough about it to truly recommend it, are dual-flush converter kits. They say they work with any toilet. There might be a later post once we research it more. Alright, enough background, here's the tip to save water every time you flush on those old toilets (good for renters):


1. Fill an old plastic bottle with water and screw on the cap.


2. Tie a string around the top.


3. Place in toilet tank and tape the string to the the tank at the back or side to hide the string. 


The water displacement will lower the amount of water used with each flush. With older toilets, they use too much water as it is. If you find your flushing power is a bit too week, pull the bottle out of the water a bit until you feel you have enough flushing power.

Peace!